What are Cookies?
- First-party cookies are created by means of the website you visit. the website online is proven inside the deal with bar.
- Third-party cookies are created via different websites. those websites own a number of the content material, like commercials or snapshots, which you see on the webpage you visit.
How to add Cookie Consent Notice?
Important!
Before we start adding codes in XML, I will recommend you to take a Backup of your current theme.
Step 01: First of all Login to your Blogger Dashboard.
Step 02: On Blogger Dashboard, click Theme.
Step 03: Click the next to 'customize' button.
Step 04: Click Edit HTML you will be redirected to editing page.
Step 05: Now search the code ]]></b:skin> and paste the following CSS codes just above to it.
/* Cookies Consent Notice */
.ckWrap{position:fixed;right:20px;left:20px; margin-bottom: 80px; bottom:-600px;z-index:10;padding:20px;background:rgba(255, 255, 255, 0.8);-webkit-backdrop-filter:blur(10px);backdrop-filter:blur(10px);border-radius:30px 30px;box-shadow:0 -10px 25px -5px rgba(0,0,0,.1);align-items:center;justify-content:center;text-align:left;animation:ckUp 2.5s forwards;animation-delay:1s;-webkit-animation:ckUp 2.5s forwards;-webkit-animation-delay:1s}
.ckWrap.acptd{animation:ckDn 2.5s backwards;animation-delay:.3s;-webkit-animation:ckDn 2.5s backwards;-webkit-animation-delay:.3s}
.ckWrap.hidden{display:none}
.ckCont h2{margin-bottom: 10px; font-size: 1.1rem; font-weight: 700; font-family: var(--fontCo);}
.ckCont h2::after {content: ''; display: inline-block; vertical-align: middle; width: var(--widgetTa); margin: 0 10px; border-bottom: 1px solid var(--widgetTac); opacity: .5;}
.ckCont p{margin:10px 0;line-height:1.4rem;color:#08102b;font-size: 14px;font-weight:400;font-family: var(--fontCo);}
.ckF{margin-top: 15px; display: flex; justify-content: center;}
.ckB {display: inline-flex; align-items: center; cursor: pointer; padding: 10px 15px; outline: 0; border: 0; border-radius: var(--buttonR); line-height: 20px; color: rgba(0,0,0,.8); background: #e9e9e9; font-size: 14px; font-family: var(--fontB); white-space: nowrap; overflow: hidden;}
.ckF >*:first-child {margin-right: 10px; border-radius: 8px; background: var(--linkB); color: #fffdfc;}
.ckF >*:last-child {flex: 0 0 auto; border-radius: 8px;}
.ckF >* {flex-grow: 1; justify-content: center;}
@media screen and (min-width:768px){.ckWrap{max-width:400px; left: 20px; right: 20px; margin-bottom:20px; border-radius:10px; bottom:-600px;box-shadow:0 5px 35px rgba(0,0,0,.1);animation:ckdeskUp 2.5s forwards;animation-delay:1s;-webkit-animation:ckdeskUp 2.5s forwards;-webkit-animation-delay:1s}.ckWrap.acptd{animation:ckdeskDn 2.5s backwards;animation-delay:.3s;-webkit-animation:ckdeskDn 2.5s backwards;-webkit-animation-delay:0.3s}}
@-webkit-keyframes ckUp{100%{bottom:0}}
@keyframes ckUp{100%{bottom:0}}
@-webkit-keyframes ckdeskUp{100%{bottom:30px}}
@keyframes ckdeskUp{100%{bottom:30px}}
@-webkit-keyframes ckDn{0%{bottom:0}100%{bottom:-600px}}
@keyframes ckDn{0%{bottom:0}100%{bottom:-600px}}
@-webkit-keyframes ckdeskDn{0%{bottom:30px}100%{bottom:-600px}}
@keyframes ckdeskDn{0%{bottom:30px}100%{bottom:-600px}}
.darkMode .ckWrap{background:rgba(50, 50, 50, 0.8)}
.darkMode .ckCont h2, .darkMode .ckCont p, .darkMode{color:#fefefe}
Step 06: We have to disable default Cookie Notice by Blogger, so add the following JavaScript Codes just above to </head>
<script>/*<![CDATA[*/ /* Disable default Blogger cookie notice */ cookieChoices = {}; /*]]>*/</script>
Step 07: Now add the following JavaScript Code just above to </body> tag. If you don't find it, it is probably already parsed which is </body>
<script>/*<![CDATA[*/ /* Cookies Consent Notice */ var ckBox=document.querySelector("#ckBox"),ckAcptBtn=document.querySelector("#ckAcptBtn"),ckErrMes="Cookie can't be set! Please unblock this site from the cookie setting of your browser.";if(null!=ckBox){ckAcptBtn.onclick=()=>{document.cookie="CookieConsentByFineshop=Accepted; max-age=2592000; path=/",document.cookie?ckBox.classList.add("acptd"):alert(ckErrMes)};let e=document.cookie.indexOf("CookieConsentByFineshop=Accepted");-1!=e?ckBox.classList.add("hidden"):ckBox.classList.remove("hidden")} /*]]>*/</script>
Step 08: Save the changes by clicking on this icon
Step 09: Then go to Layout Menu.
Step 10: Create a gadget by clicking on Add a Gadget and choose HTML/Javascript.
Step 10: Paste the following HTML Codes in it.
<!--[ Cookies Consent Notice ]-->
<div class='ckWrap hidden' id='ckBox'>
 <div class='ckCont'>
 <!--[ Cookies Notice Heading ]-->
 <h2>Cookies Consent</h2>
 <!--[ Cookies Notice Detail ]-->
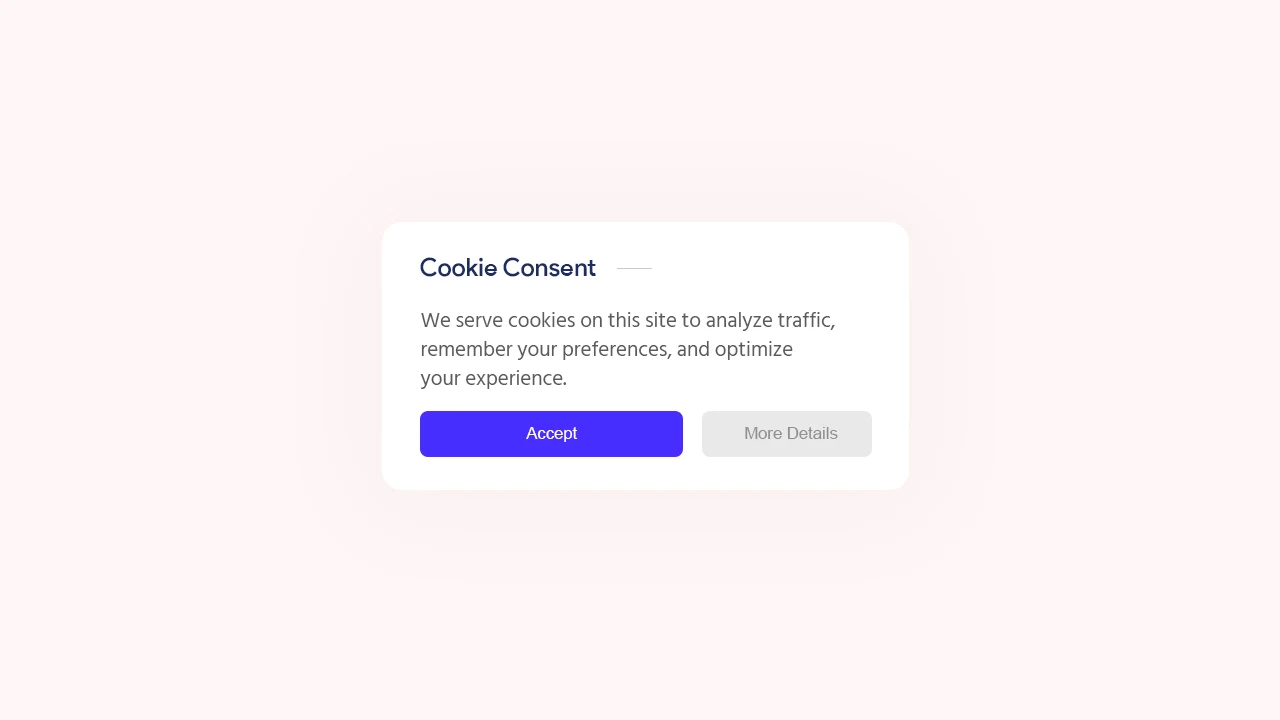
 <p>We serve cookies on this site to analyze traffic, remember your preferences, and optimize your experience.</p>
 </div>
 <div class='ckF'>
 <button class='ckB' id='ckAcptBtn'>Accept Cookies!</button>
 <a class='ckB' href='https://policies.google.com/technologies/cookies'>Learn More</a>
 </div>
</div>
Step 12: Finally, save the changes by clicking on this icon
That's done! Now your website will show a pop-up with Accept all! and Learn More Buttons regarding Cookies.
